> ## Documentation Index
> Fetch the complete documentation index at: https://guide.chatwize.ai/llms.txt
> Use this file to discover all available pages before exploring further.
# How it works
> Finding your way in the dashboard: where everything lives.
This is the one thing to learn once; after that you can find every feature.
## The left sidebar
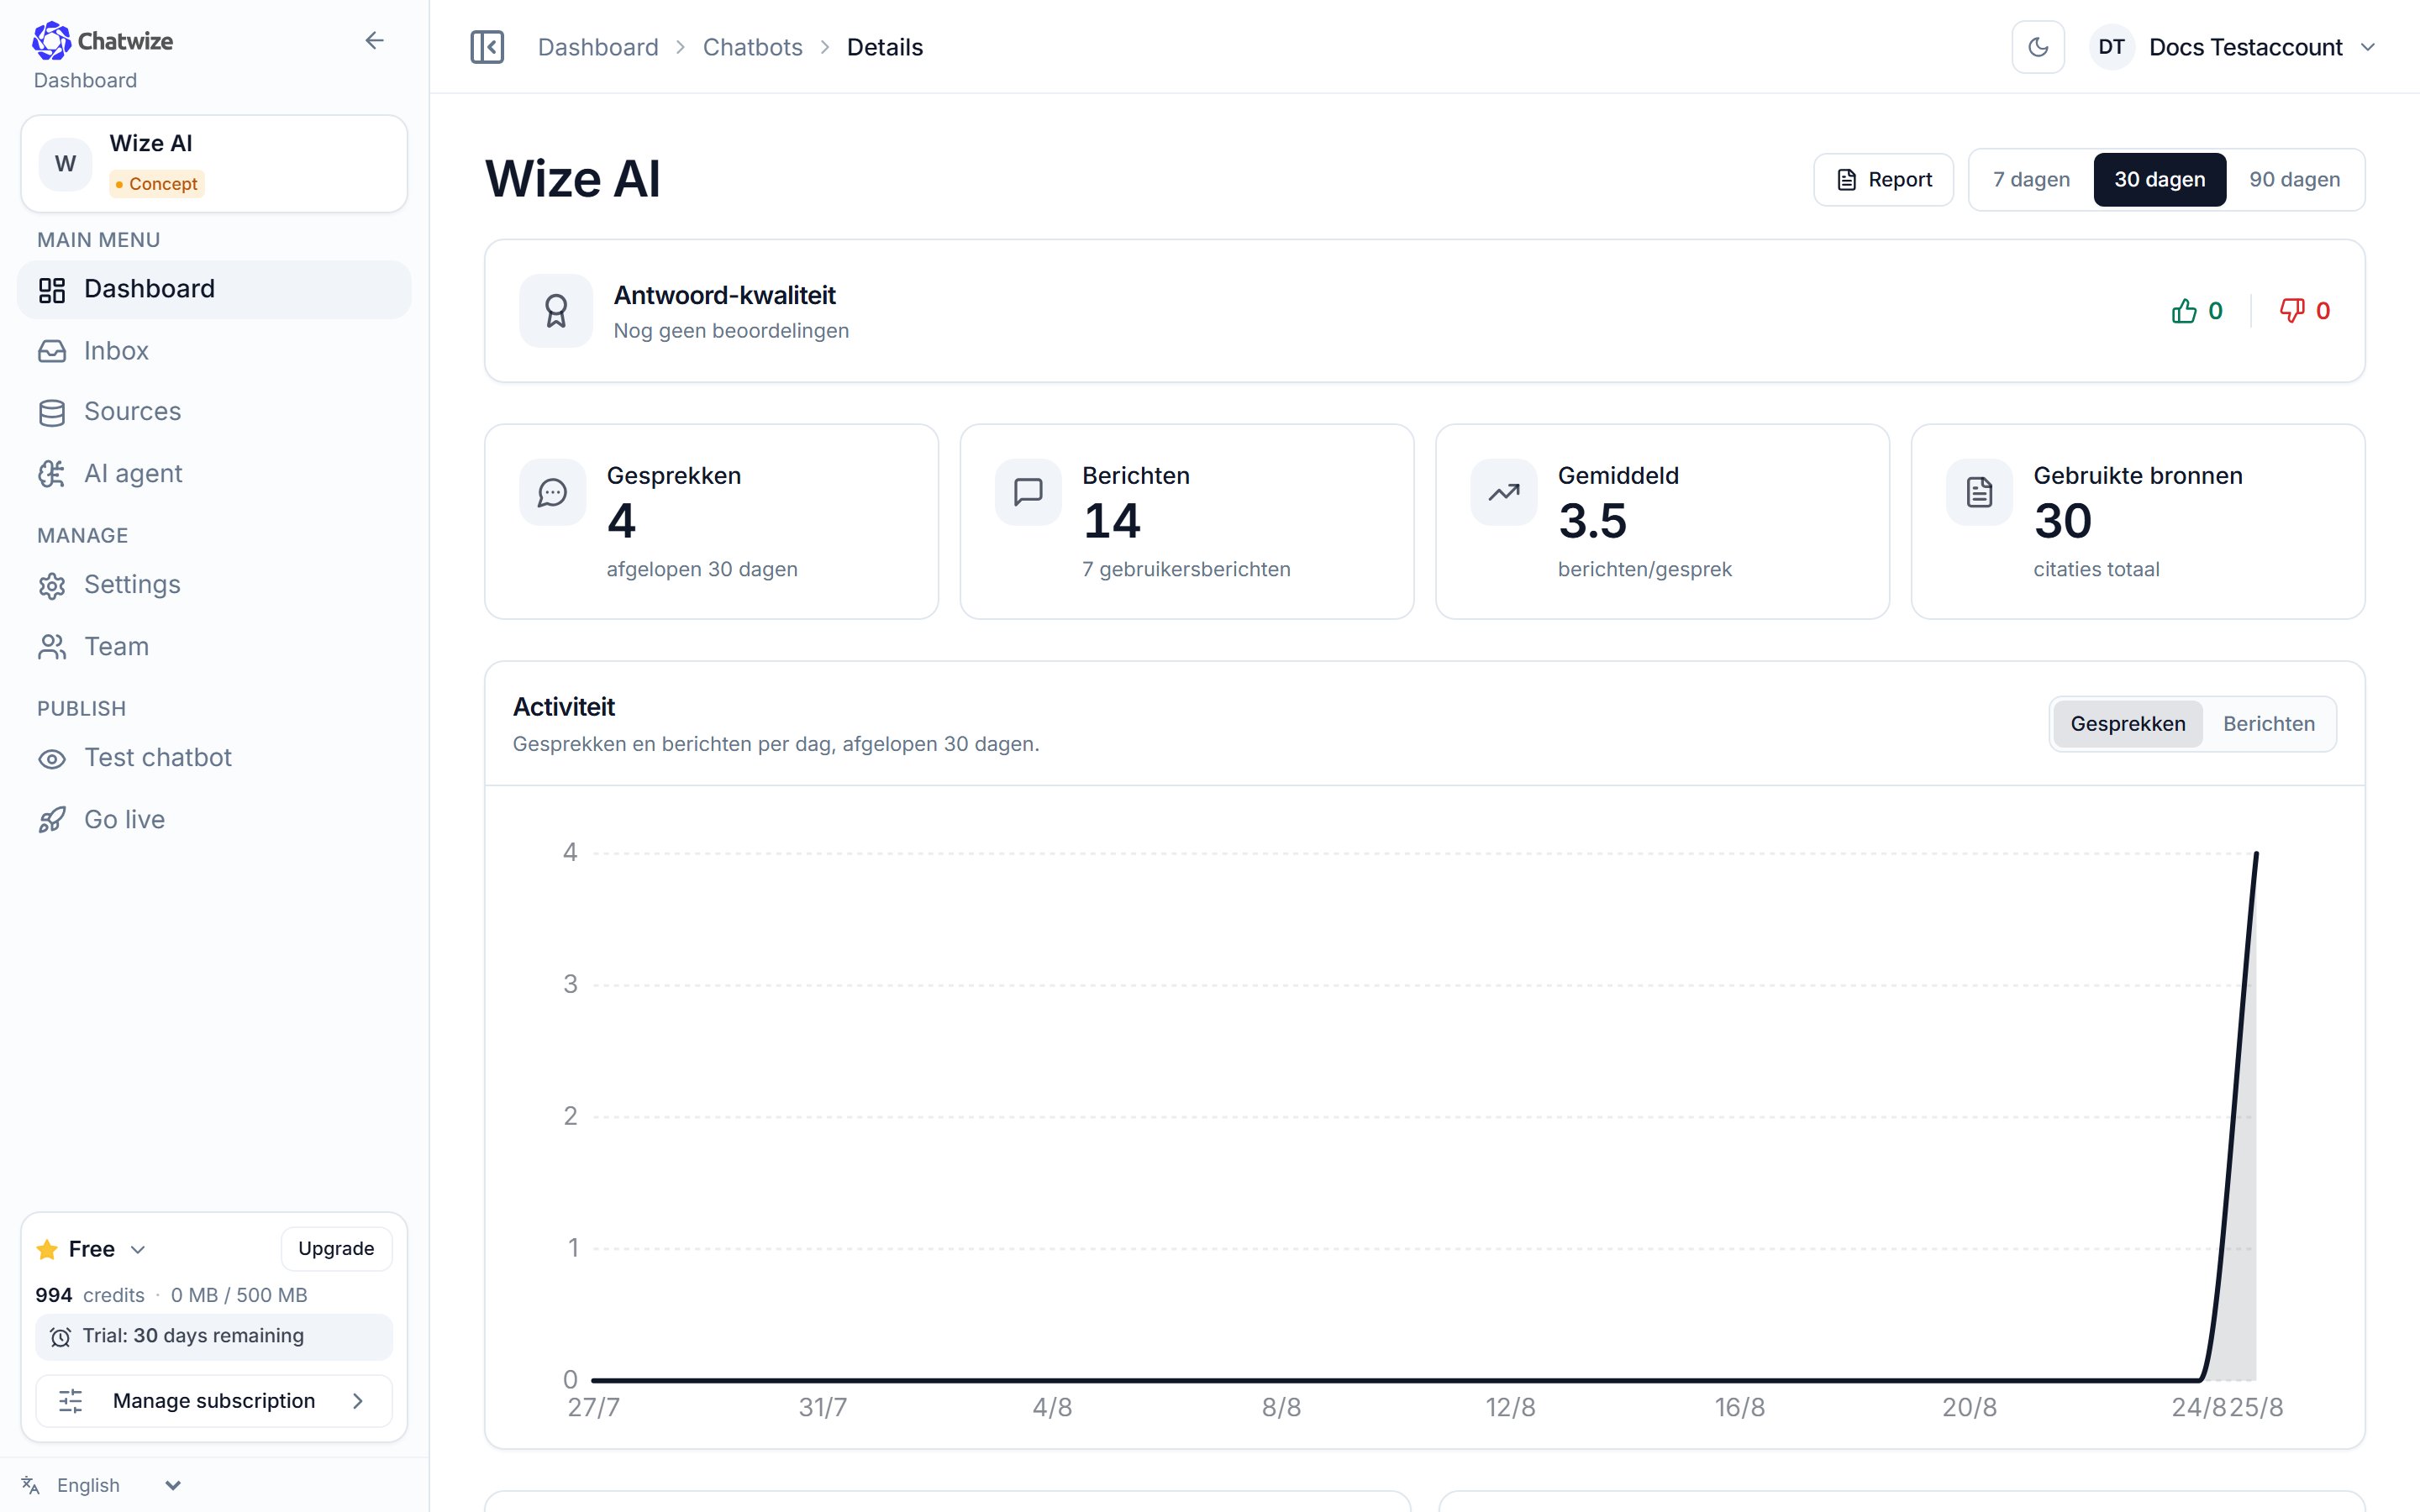
When you open a chatbot, everything for that chatbot sits in the **left
sidebar**, split into three groups:
 | Group | What's in it |
| ------------- | ------------------------------------------------------------------------------------------------------------------------------- |
| **Main menu** | **Dashboard** (statistics), **Inbox** (conversations and collected data), **Sources** (its knowledge), **AI agent** (behaviour) |
| **Manage** | **Settings** (the widget and its behaviour), **Team** (people and their permissions) |
| **Publish** | **Test chatbot** (try it out), **Go live** (put it on your site) |
Parts your account has no permission for aren't shown in the menu and can't be
opened either. **Team** is admins only. At the bottom of the sidebar you'll find
your usage and the NL/EN language switch; your workspace sits in the top right.
## The Settings page
Most things you want to change live under **Settings**. That page is a list of
**sections** you click to expand. Changing a setting is always two steps:
**open Settings → open the right section.**
The sections are bundled into six groups:
| Group | What for |
| ----------------------------- | ---------------------------------------------------------------------------------------------------- |
| **Appearance** | Colors, size, greeting, avatar, example questions, input field, footer, chat button, greeting bubble |
| **Conversation** | Citations & copying, disclaimer |
| **Access & management** | Password protection, rate limit, handover to a person, labels |
| **Collecting data** | Contact form, variables, satisfaction & feedback |
| **Forwarding & integrations** | Webhook, email notifications |
| **Danger zone** | Delete chatbot |
On the right is a **live preview** of the widget, so you see every change as you
make it. At the bottom a bar appears to save or discard your changes.
Say you want visitors to be able to reach a person:
In the left sidebar, under **Manage**, click **Settings**.
Scroll to the **Access & management** group and click **Handover to a
person** to expand it.
Every feature page in this guide starts with a **"Where to find it"** list.
## How an answer is produced
For every question, Chatwize first looks up the relevant passages in your own
sources and writes the answer from those. So the chatbot answers from your
content, and can show the source alongside.
Clear, well-structured pages produce clear answers. See
[Knowledge base](/en/knowledge-base).
Next: build one in the [Quickstart](/en/quickstart).
| Group | What's in it |
| ------------- | ------------------------------------------------------------------------------------------------------------------------------- |
| **Main menu** | **Dashboard** (statistics), **Inbox** (conversations and collected data), **Sources** (its knowledge), **AI agent** (behaviour) |
| **Manage** | **Settings** (the widget and its behaviour), **Team** (people and their permissions) |
| **Publish** | **Test chatbot** (try it out), **Go live** (put it on your site) |
Parts your account has no permission for aren't shown in the menu and can't be
opened either. **Team** is admins only. At the bottom of the sidebar you'll find
your usage and the NL/EN language switch; your workspace sits in the top right.
## The Settings page
Most things you want to change live under **Settings**. That page is a list of
**sections** you click to expand. Changing a setting is always two steps:
**open Settings → open the right section.**
The sections are bundled into six groups:
| Group | What for |
| ----------------------------- | ---------------------------------------------------------------------------------------------------- |
| **Appearance** | Colors, size, greeting, avatar, example questions, input field, footer, chat button, greeting bubble |
| **Conversation** | Citations & copying, disclaimer |
| **Access & management** | Password protection, rate limit, handover to a person, labels |
| **Collecting data** | Contact form, variables, satisfaction & feedback |
| **Forwarding & integrations** | Webhook, email notifications |
| **Danger zone** | Delete chatbot |
On the right is a **live preview** of the widget, so you see every change as you
make it. At the bottom a bar appears to save or discard your changes.
Say you want visitors to be able to reach a person:
In the left sidebar, under **Manage**, click **Settings**.
Scroll to the **Access & management** group and click **Handover to a
person** to expand it.
Every feature page in this guide starts with a **"Where to find it"** list.
## How an answer is produced
For every question, Chatwize first looks up the relevant passages in your own
sources and writes the answer from those. So the chatbot answers from your
content, and can show the source alongside.
Clear, well-structured pages produce clear answers. See
[Knowledge base](/en/knowledge-base).
Next: build one in the [Quickstart](/en/quickstart).