Human Support Escalation in Chatwize lets collaborators take over ongoing chats when human expertise is required.
As powerful as AI chatbots can be, sometimes human accountability and expertise is still needed. Chatwize’s
built-in human support escalation feature allows you or your collaborators to step in during any ongoing chat
session and take over the conversation.
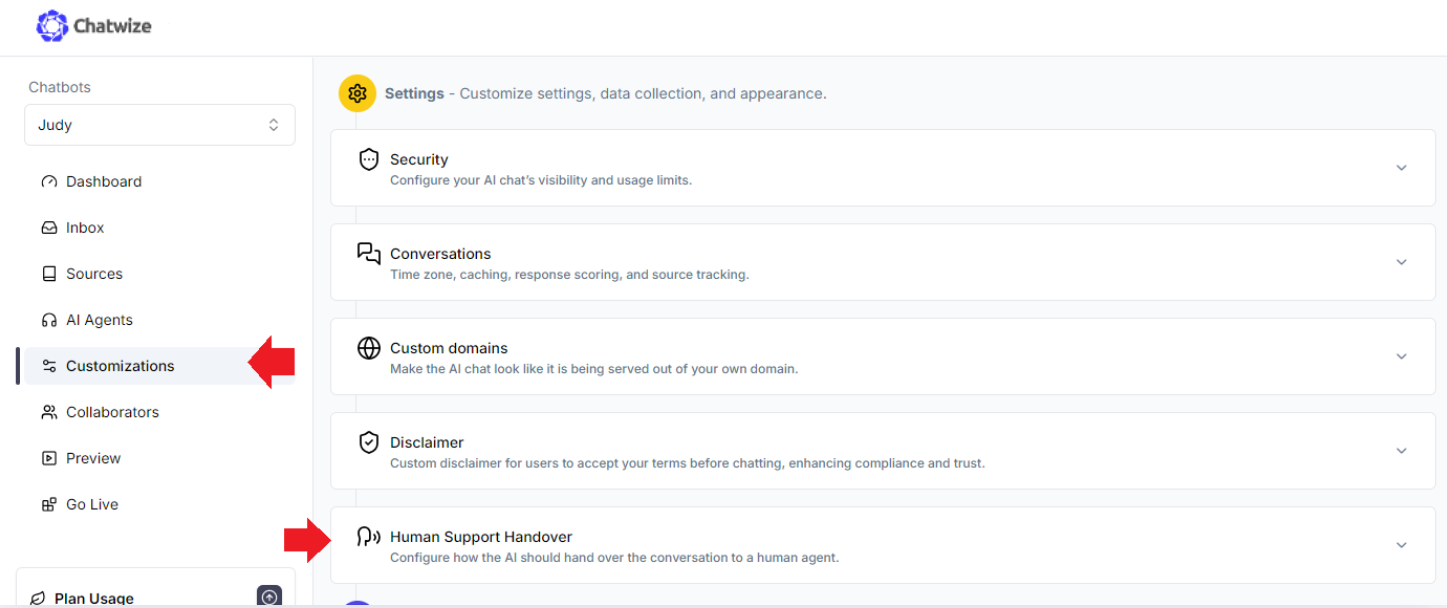
Go to Customizations tab. Under the “Settings” section, Click “Human Support Handover”.
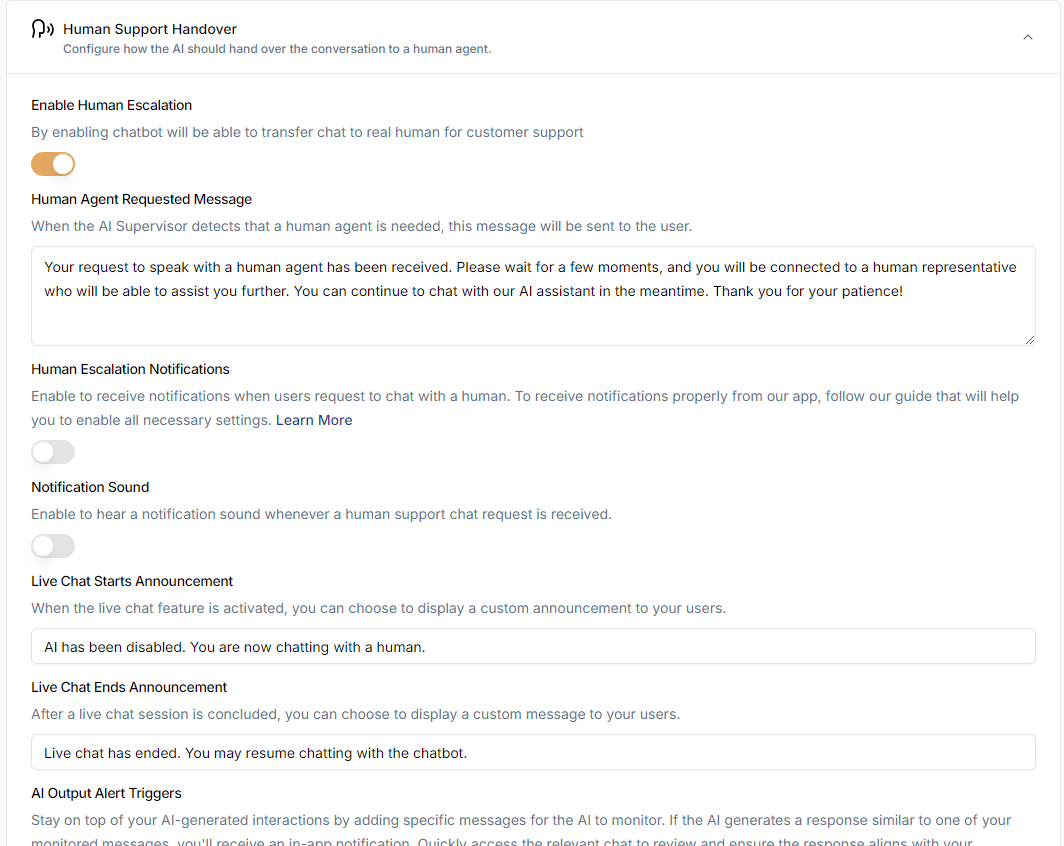
Toggle on “Enable Human Escalation”. Then a number of configuration options should appear.
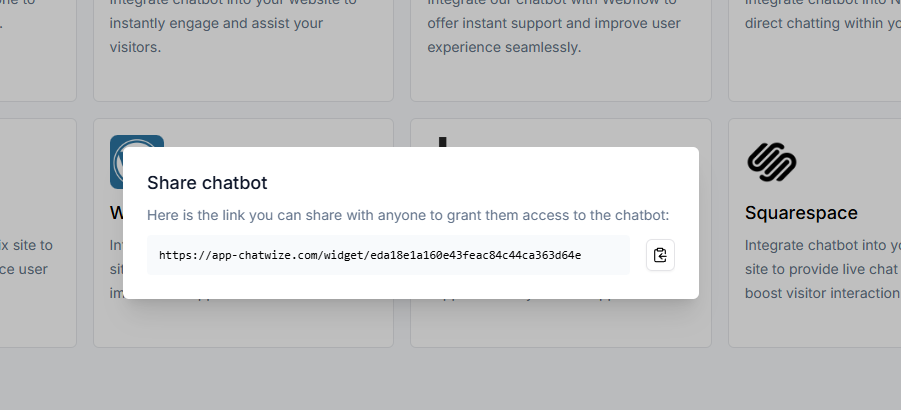
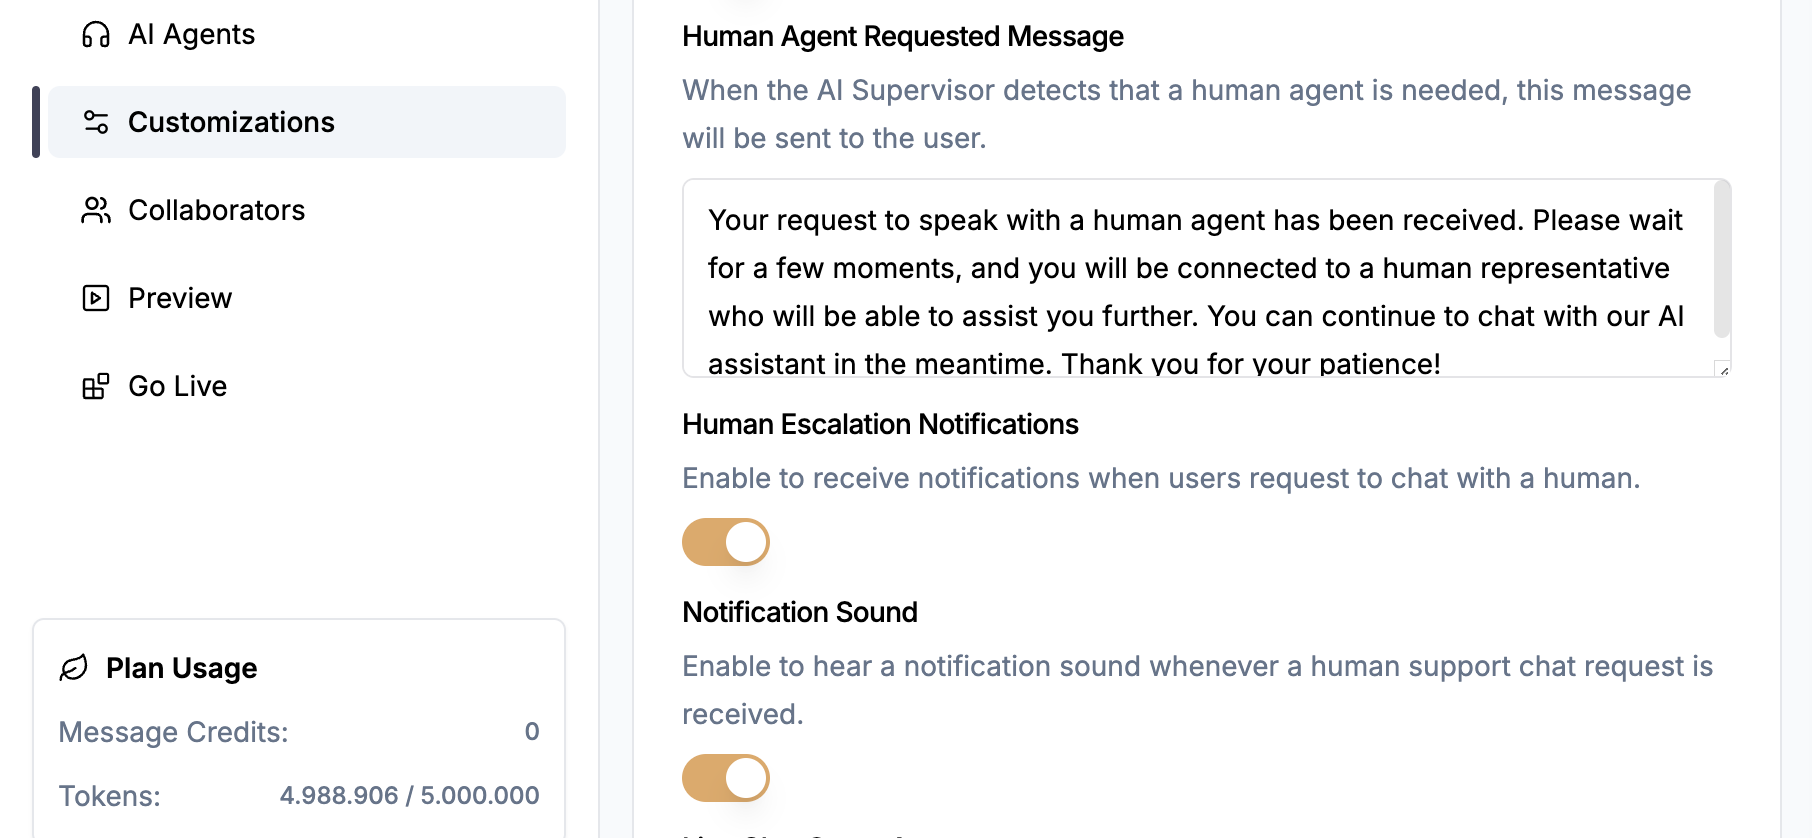
You can configure what the AI says when human escalation request is detected during the conversation, as well as what shows up when a human agent takes over or leaves the chat. For more advanced use cases, you can even define custom phrases or intents that the AI should be looking out for. If the AI responds with that phrase, your human agents will receive a notification immediately.To test your human support escalation setup, you’ll need to generate a public link to the chatbot and access it using another browser tab. The built-in “Preview” tab does NOT support human escalation testing.Go to “Go Live” tab, click “Share”. You may need to change your chatbot visibility settings temporarily in order to generate the link.
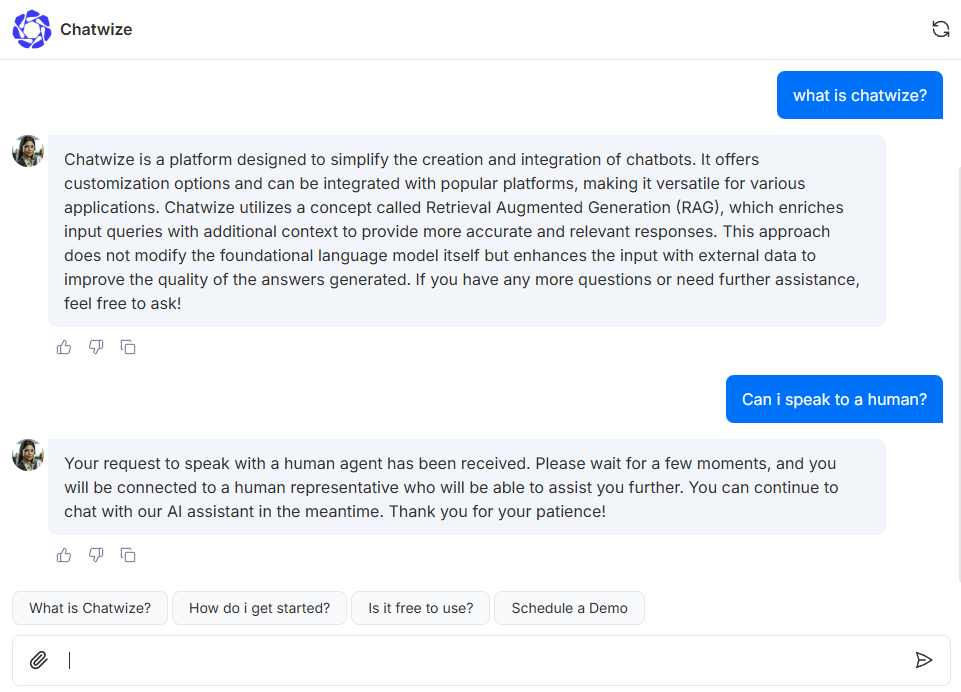
Once you have the link, open a new browser tab and navigate to it. Do not close the original Chatwize tab. You should be taken to the chatbot as a typical user. You can then test it by submitting queries requesting human support.
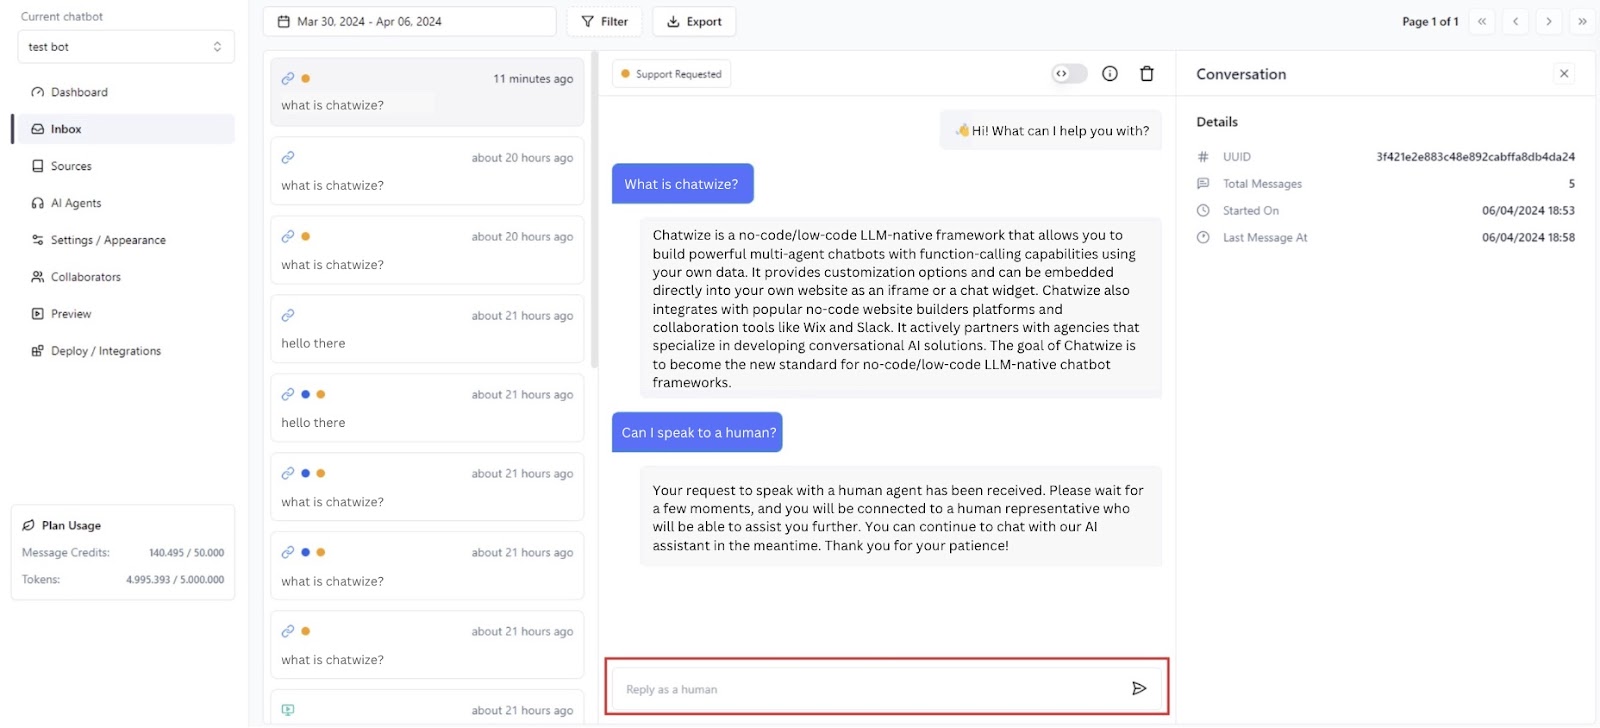
To take over as a human agent, head over to “Inbox” in your Chatwize browser tab. You should see an orange dot
next to the session requesting human support. Click it and you will be able to engage directly with the user. Simply start
typing a response in the chat input text box at the bottom of the chat log.
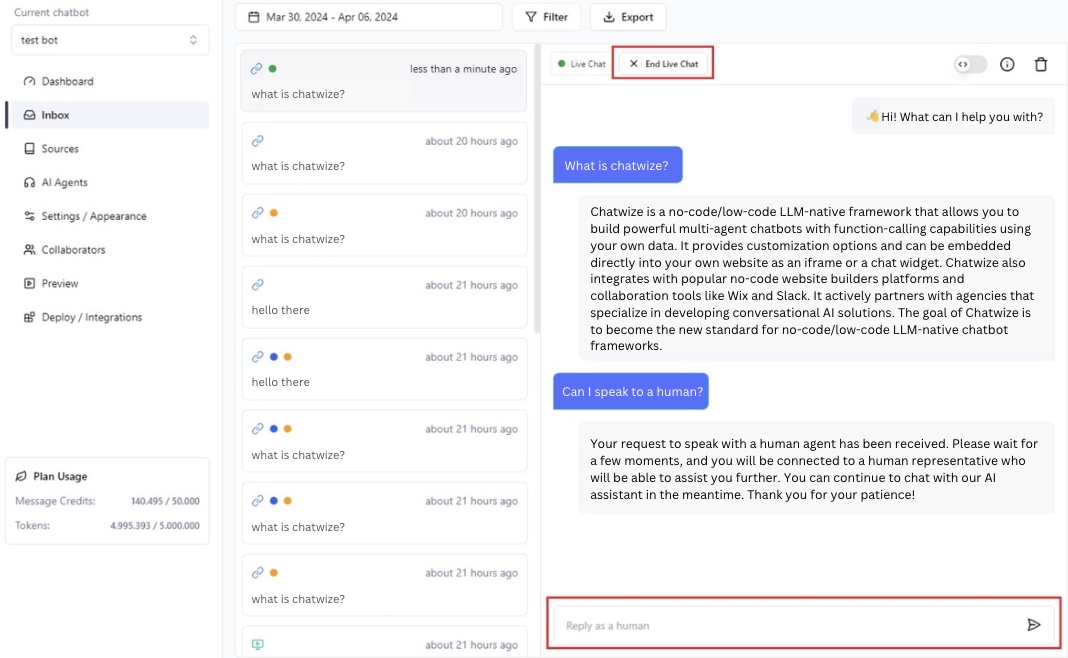
As soon as you send the first message, AI Supervisor and all AI Agents will be disabled. You can have a direct conversation with your
user for as long as you’d like. Once you are done, you can end the live chat session and put your user back on to the AI chatbot by clicking
“End Live Chat”.
You may stay and continue to monitor the user’s interaction with the chatbot as the AI regains control over response generation.Depending on your use case, you may wish to fine tune the circumstances when the user should be redirected to a human agent. To do so, please
review our documentation on Fine Tuning Agent Intents.
Each web browser manages permissions for notifications and sounds on a per-website basis. To ensure that you receive notifications
properly, you’ll need to enable both permissions within your browser settings. To proceed forward:
Enable your browser permissions by choosing option bellow:
Google Chrome
1
Settings
Click on the button near url in the top-left corner, then select “Site
settings”.
2
Enable permissions
Make sure that “Notifications” and “Sound” are set to Allow in
“Permissions settings”.
Firefox
1
Settings
Click on the button near url in the top-left corner, then select
“Protection settings”.
2
Unblock Chatwize
Scroll to “Permissions” and adjust the default settings for “Speaker
Selection” and “Notifications”. Ensure that the Chatwize platform is
not blocked for both options.
Microsoft Edge
1
Settings
Click on the button near url in the top-left corner, then select
“Permissions for this site”.
2
Enable permissions
Make sure that “Notifications” are set to Allow in “Permissions settings”
Safari
1
Chatwize settings
Click on “Safari” in the top-left corner of your screen, then select
“Settings for app.chatwize.ai”.
2
Enable pop-ups
Make sure that “Pop-up Windows” are set to Allow.
3
Settings
Click on “Safari” in the top-left corner of your screen, then select
“Settings”.
4
Enable notifications
In the “Websites” tab, choose “Notifications” option and make sure that
permissions are set to “Allow” for app.chatwize.ai
Operating systems also have their own permissions that allow setting restrictions to notifications
for different apps, including browsers. To enable notifications, choose your operating system below:
If you are using Safari, you do not need to follow these steps.
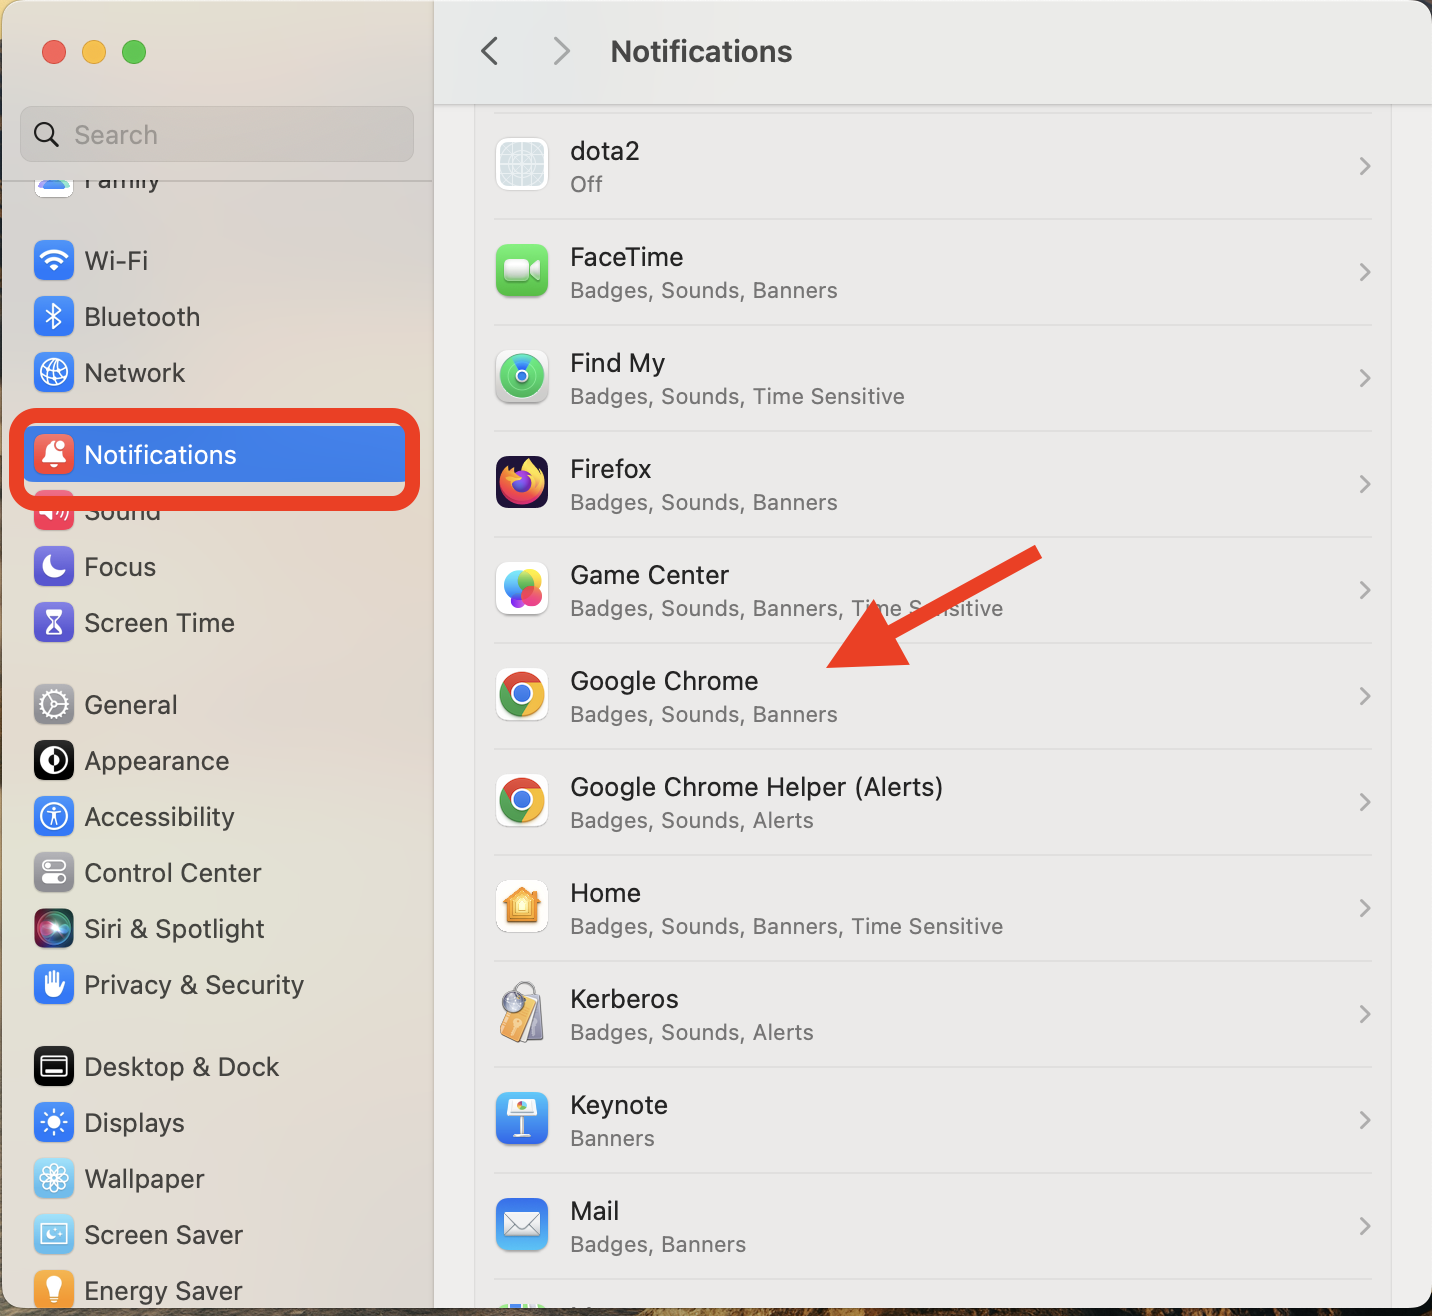
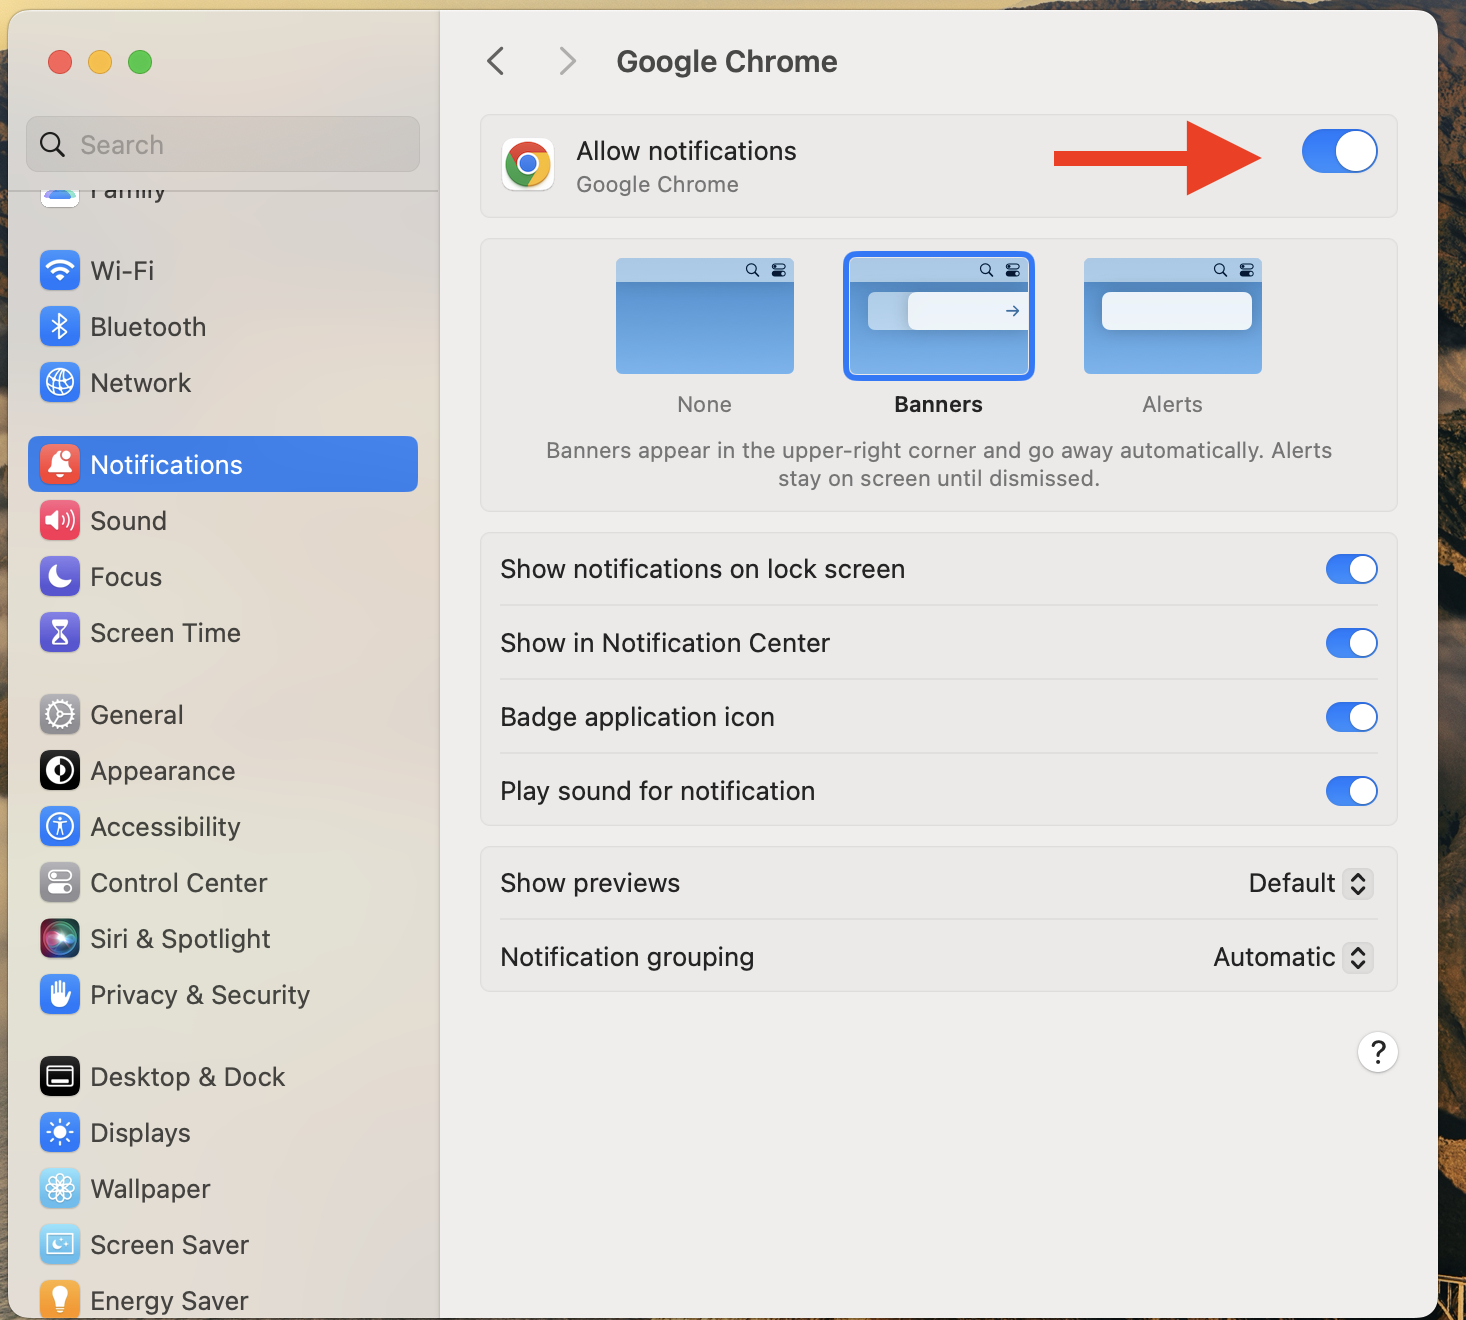
Apple
1
Settings
Click on the “Apple” in the top-left corner, then select “System
Settings”.
2
Browser notifications
Choose “Notifications” option and select the browser you wish to use.
3
Enable notifications
Make sure that “Allow notifications” option is enabled.
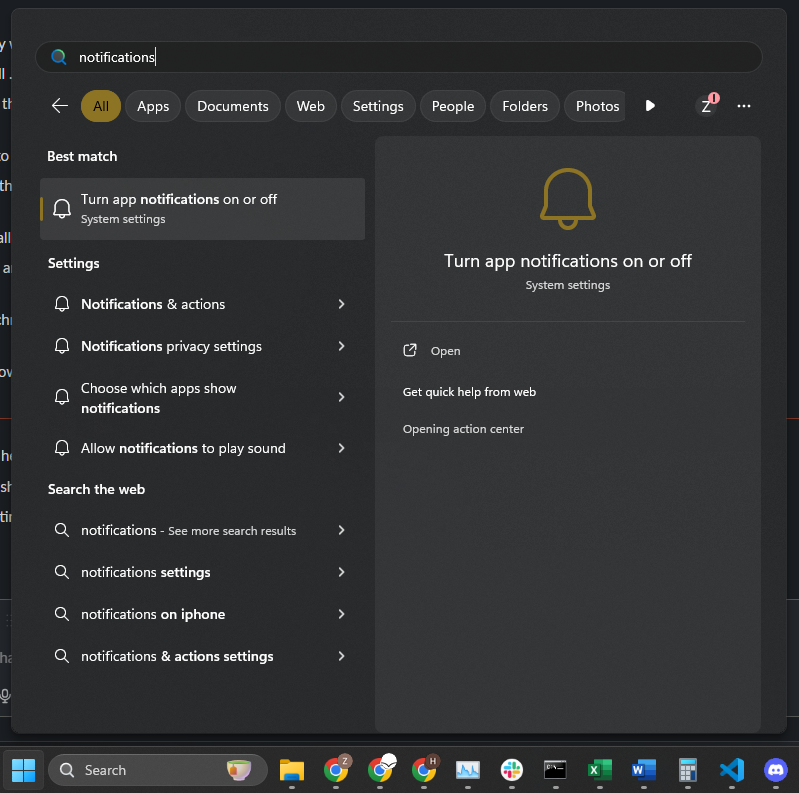
Windows
1
Settings
In the search bar, type “notifications” and select the “Turn app
notifications on or off” option from the search results.
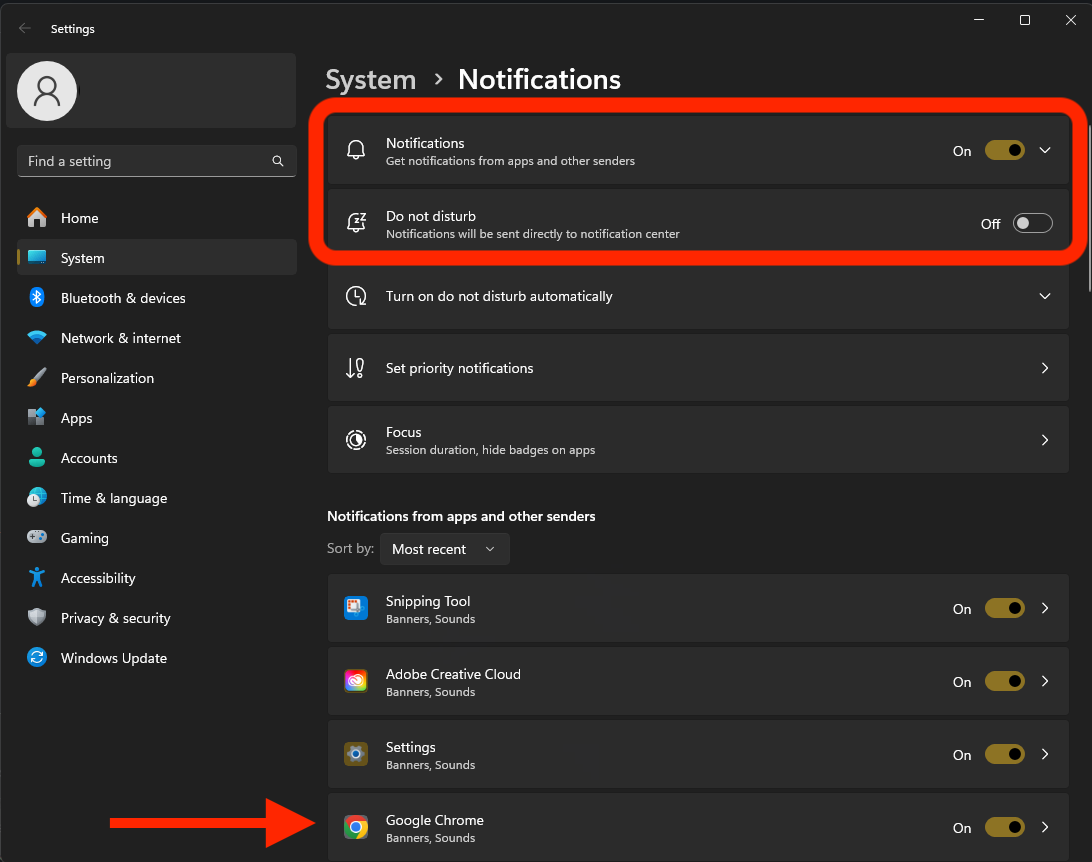
2
System notifications
Enable system notifications (Optional) and select your preferred
browser under “Notifications from apps and other senders” list.
3
Browser notifications
Make sure that “Notifications” are On for your browser.